Thursday, September 30, 2010

Ionic Cubes and an Octahedron

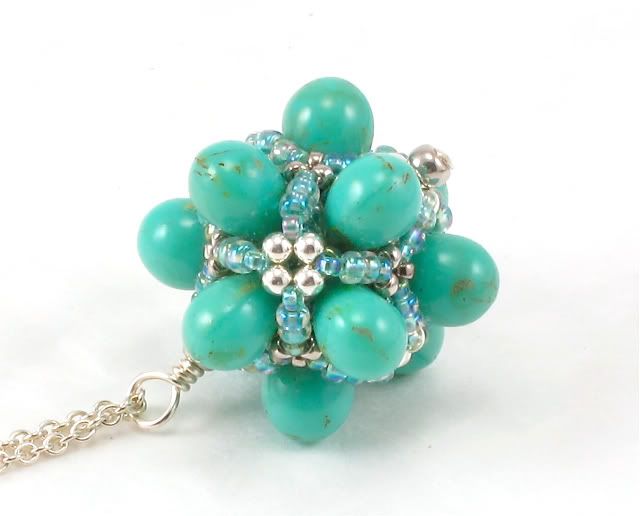
I had the pleasure and privilege of testing Gwen's new Ionic Polyhedra pattern, and I ended up with a nice handful of these fascinating beaded beads. I began with the Ionic Cube, the first Ionic Polyhedron in the pattern:


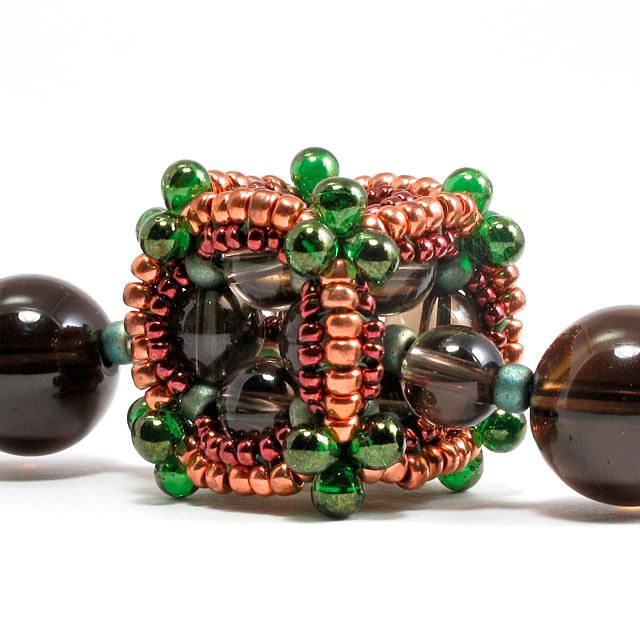
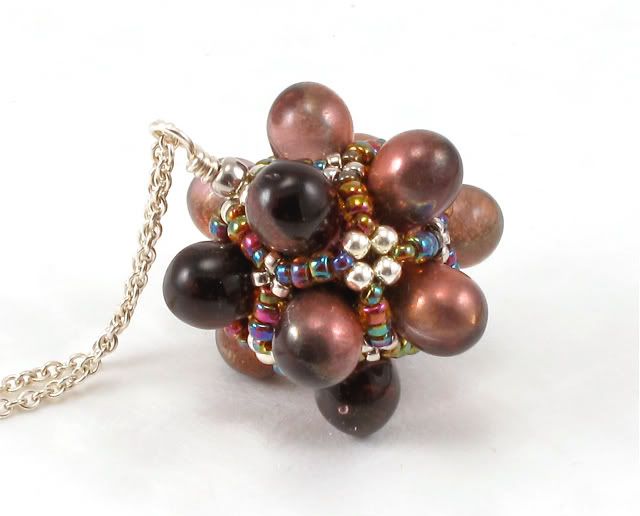
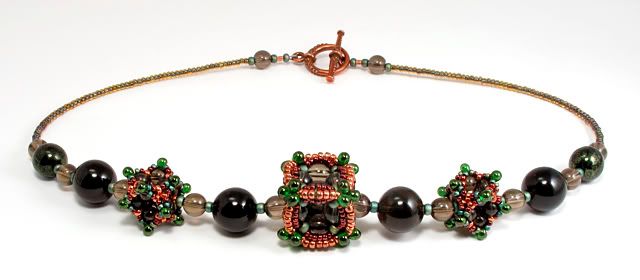
I used smoky quartz round beads that I had kicking around from a previous Rings and Things Roadshow shopping spree, which led me to create this beaded bead in a nice fall palette with metallic and copper-plated seed beads, plus some goldluster green fringe drop beads. I think that the copper-plated seed beads are a little bit bright right now, but in my experience these seed beads tend to oxidize over time, so this beaded bead should look nicely color-balanced after a little while.

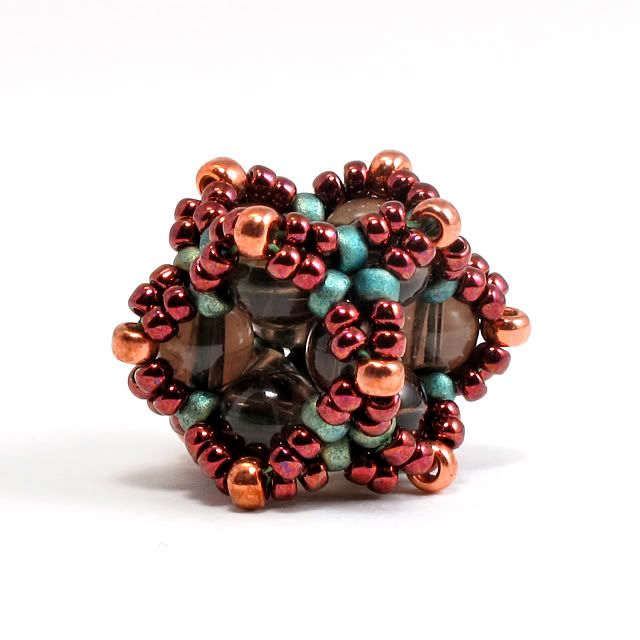
This design was really satisfying to make. It starts out a little loose and squishy, but ends up very stiff and sturdy by the time it's complete. I found this aspect particularly satisfying considering that it's completely hollow.

I also made some matching Mini Ionic Cubes, which are explained in the pattern as variations:


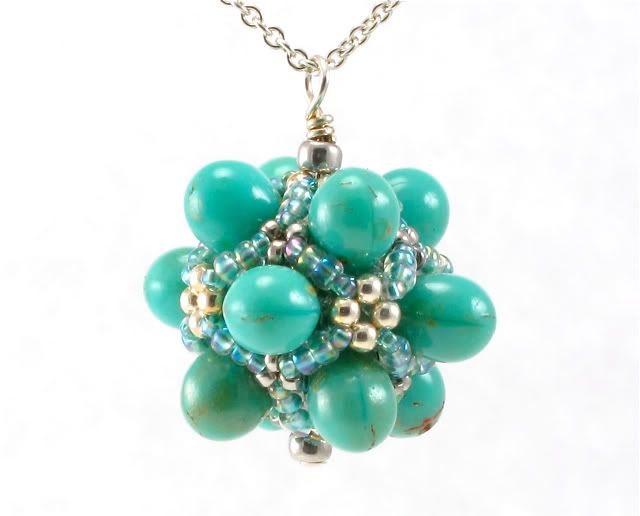
These little beads are right up my alley; they're small, cute, and work up really quickly. In addition to looking nice as a pair of earrings, I think that five or seven of them would work well in a choker or princess-length necklace.

I made two of them and strung them with the regular Ionic Cube, along with more round smoky quartz beads and Japanese seed beads. I even added my own little touch to the Mini Ionic Cubes... Can you tell?


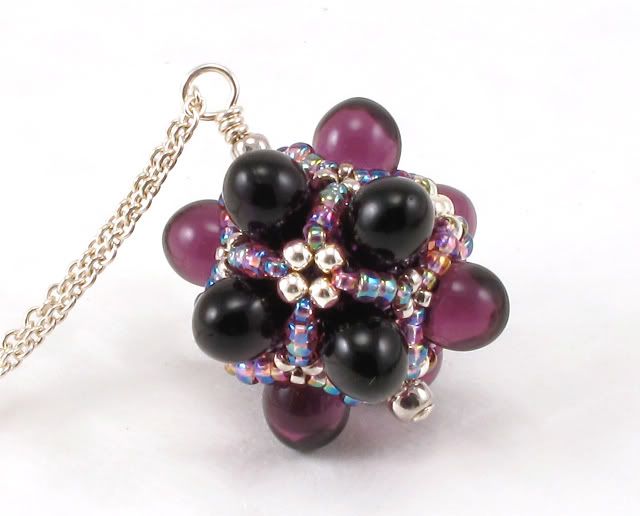
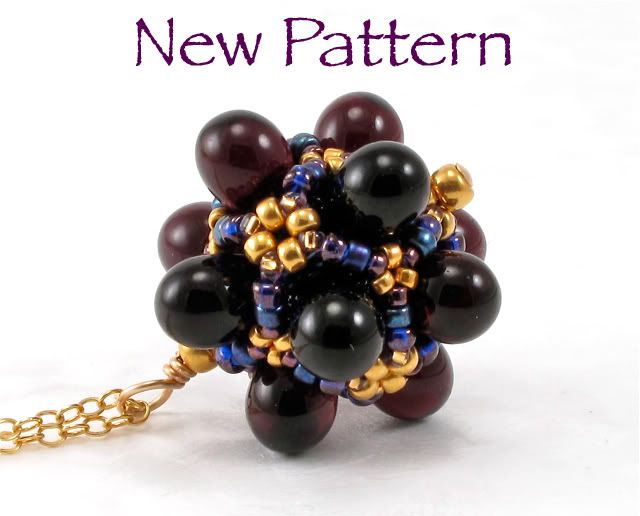
I haven't yet decided what to do with my second regular Ionic Polyhedron. This one is the Ionic Octahedron, for which I used firepolish Czech glass beads and more matte Japanese seed beads:


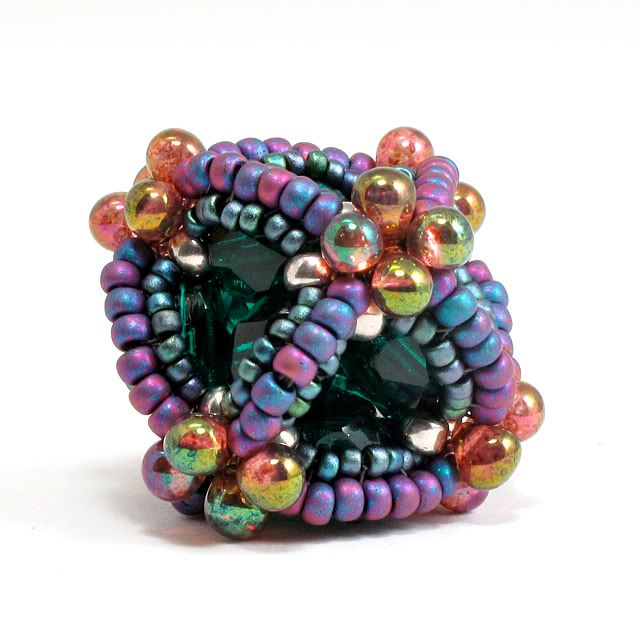
I'm thinking that it would make a nice solo pendant, but I might want to incorporate it into a necklace with other beads... I think I need to mull it over a bit more.

The Ionic Polyhedra pattern is available at beAd Infinitum, and it explains, in great detail, how to make these and other polyhedra in both the mini and regular Ionic forms. Florence wrote an interesting post on the evolution of this design, which is a must-read for anyone interested in the behind-the-scenes development of new beaded bead ideas. For more examples of Ionic Polyhedra, check out Gwen's beaded beads here here and here. Her Ionic Rhombic Dodecahedron, shown on her blog, is particularly fantastic!

Tuesday, September 28, 2010

Balloon Box Pendants in the Shop

I listed a few new pendants in my Etsy shop. All three of these pendants use the Balloon Box beaded bead design.

Here's one in purple:


All three pendants are available in my Etsy shop. The Balloon Box Pattern is available at beAd Infinitum if you'd like to make your own.

Monday, September 27, 2010

My Handmade Wedding, Part 2


On to Part 2 of pictures from my wedding, where I'll talk about the favors, flowers, and other crafty decorations. If you missed it before, check out Part 1 for the jewelry and dresses.

As with Part 1, all of the photos you are about to see were taken by Jason and Juvenia, who own the copyright to said photos. Check out their website at www.jasonandjuvenia.com for more beautiful wedding photography.

We looked all over the San Francisco Bay Area for our wedding venue, but we found the perfect place at the nondenominational St. Peter's Chapel on the old decommissioned naval base only 10 minutes from our house:


I had originally envisioned having an outdoor wedding, but we loved this chapel for two main reasons. First, most of the chapel's 25+ stained glass windows were done by Tiffany studios, making it the largest collection of Tiffany glass under one roof west of the Mississippi. The colors in these windows are just breathtaking:


Second, my husband Darby is a professional French horn musician, and the acoustics in this chapel were perfect for a horn choir. He arranged all the music for our ceremony, and a group of his friends and colleagues so kindly agreed to play in our wedding. It was such a special gift to both us and our guests:


Darby even played in a few of the selections himself. He must have spent over 40 hours selecting and arranging the music:
Together with my Mom, we designed our wedding invitations to show our collective talents in music and origami:


And in keeping with the origami theme, the favors were a pair of paper cranes in the Rokoan style, connected at the wing. Rokoan style paper cranes are made from one sheet of paper that has been cut in a specific pattern to create connected paper cranes, usually joined at the wing tip or nose (Linda Tomoko Mihara makes breathtaking origami pieces in this style). No glue is needed for these connected paper cranes, but it can be difficult to fold them together without tearing the paper at the connections. I had thought about making the more-romantic kissing cranes for the wedding favors, but these can be rather delicate, so I did flat kissing cranes for the invitations and more durable wing-connected cranes for the favors:


I didn't make quite enough for a Senbazuru, but together with Darby we must have made close to 500.

Our wedding flowers were both fresh and beaded. Some french-beaded wisteria from Carol Benner Doelp's The Art of French Beaded Flowers were perfect for decorating the card-collecting box:
My bouquet included roses, orchids, and some kind of greenery from my backyard:


With one hidden french beaded flower made by my late great-grandmother Mimi:


My bridesmaids' flowers contained roses and some beautiful pink and purple hydrangeas:
And our display cake, baked by my expert-baker friend Shannon, was decorated with some pretty purple orchids:


The rubber duckie cake-toppers are a funny story: last March I went to a bridal fair and nearly had a nervous breakdown from all the pressure from the bridal vendors, and from what I can only describe as the "look" they gave me when I said I was planning my wedding in 6 months, not 18. My Mom and I went to Joann Fabrics afterward, where we ended up picking out the pattern for my dress, followed by a visit to a Michaels craft store. I found these duckies there and bought them on the spot, because I thought they were cute and whimsical and added a much-needed flavor of humor to the whole planning process.

The cake toppers led to the design of the floating-flowers-and-mini-rubber-duckies centerpieces, which were put together by some good friends from work. The big rose is from my backyard!


To wrap it all up, here's a photo of the whole wedding party:
And the happy couple:


Thanks for looking!

Monday, September 20, 2010

New Pattern: Balloon Box Beaded Bead

My newest pattern, the Balloon Box Beaded Bead, is available for purchase!


You might remember the post I made about this design earlier this year. I began designing this beaded bead with the goal of using larger 6 by 9 mm Czech teardrop beads instead of the 4 by 6 mm drops that I usually use. The resulting design is so fun to make! I could easily make a half dozen of them in an afternoon without getting bored. As I mentioned in the previous post, they work well as both necklace components and as solo pendants.


This design is also quite amenable to variations. I experimented with making 5- and 6-fold variations, using crystals instead of drop beads, and also using drop-shaped freshwater pearls. I love how the pearl version of this design turned out:


I incorporated these pearl Balloon Boxes into a pearl-themed necklace. The focal is the 5-fold version of this design:


I couldn't bear to sell this necklace, so it became a mother-of-the-bride gift for my Ma :).

The Balloon Box pattern is currently available at beAd Infinitum, alongside my Circle Starburst pattern and a few dozen of Gwen and Florence's mouthwatering beaded bead designs. For more Balloon Box images, check out the beAd Infinitum Galleries!

As always, I'd love to see your own Balloon Box beaded beads!

Saturday, September 18, 2010

My Handmade Wedding, Part 1


It's been a while since I've blogged huh? Well here's just a little of what I've been up to for the past few months :)

A little over a month ago I married my best friend and companion of over 9 years. This being a crafty blog, I thought I'd talk a bit about the crafty and handmade aspects of my wedding. After going through our wedding pictures, I realized that so much of my wedding was handmade that there was just too much to talk about for one blog post! So for now, I'm going to show the jewelry and attire.

Before I start, I'd like to give a shout-out to the highly talented Jason and Juvenia, who took all the photos you are about to see and own the copyright on said photos. Check out more of their fantastic photography at www.jasonandjuvenia.com.

For my and my bridesmaids' hair, I taught myself to make wire-wrapped hairpins using Swarovski crystals, freshwater pearls, and various shapes of silver-lined Japanese seed beads. They're surprisingly easy and fun to make!


I probably had 18 or so in my hair:

For my bridesmaids' hairpins, I used purple crystals and purple glass beads...


...To match their purple dresses. Anyone starting to see a color theme here? ;) Here's Alexa, a friend of many years to both me and my husband:

And my sister and maid-of-honor Peggy (left), and my buddy Lieza (right):


Since the bridesmaids' dresses came up high on the neck, I made all of them bracelets instead of necklaces, and I also made their matching earrings. The bracelets are in triangle weave, and use Czech drop beads, Japanese fringe drops, Japanese seed beads, Swarovski crystal, freshwater pearls, and the new peanut-shaped Japanese seed beads:

Did I mention how talented Jason and Juvenia are? Check out the resolution on the original size of the photo above; you can see the individual size 15° seed beads!

For my own bridal jewelry, I wanted to create something ambitious because I usually don't get the chance to wear extravagant jewelry, and what better excuse to do so than at my own wedding? I wanted a necklace with a bunch of beaded beads, in pearls and clear crystals to match my gown. I also wanted the beaded beads to hang like charms as opposed to being strung through, so I created a scaffold of three layers of loops of pearls and crystals, so that I could hang a beaded bead from each loop. I originally wanted to make over a dozen beaded beads alternating between pearls and crystals, but this many beaded beads wouldn't drape right, so I settled on seven beaded beads made out of freshwater pearls and Japanese seed beads:


The focal is a Teardrop Bubbles beaded bead (using the same pearls as this one), combined with two Bubble Box beaded beads and four Double Bubble Jacks beaded beads in two different sizes. The earrings are also Double Bubble Jacks beaded beads.

Here I am all dressed up :)

My mother sewed my gown out of smooth and quite comfortable silk. I know little about sewing, but I think she did a fantastic job:

We coordinated our efforts to balance the complexity of the jewelry with the simplicity of the dress:


Here I am with my Ma. Anyone recognize her necklace?

One final shout-out to Etsy sellers simplybeautyveils (my veil matched the dress perfectly!) and elegantgartershop (great for something blue!) for the rest of my bridal accessories. Next time: flowers and wedding favors!
Related Posts Plugin for WordPress, Blogger...