Monday, October 18, 2010

2nd Annual SATeam Wrist Candy Holiday Giveaway!

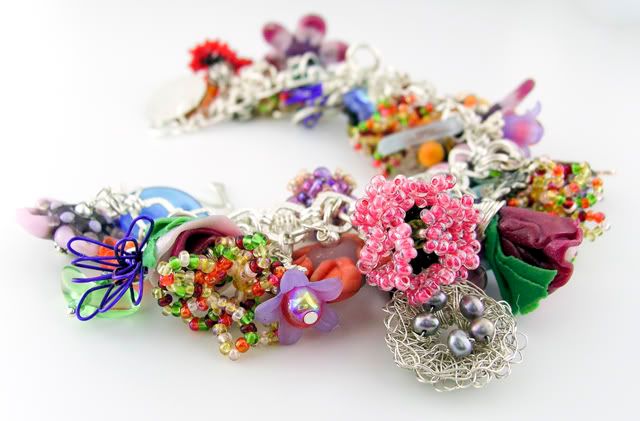
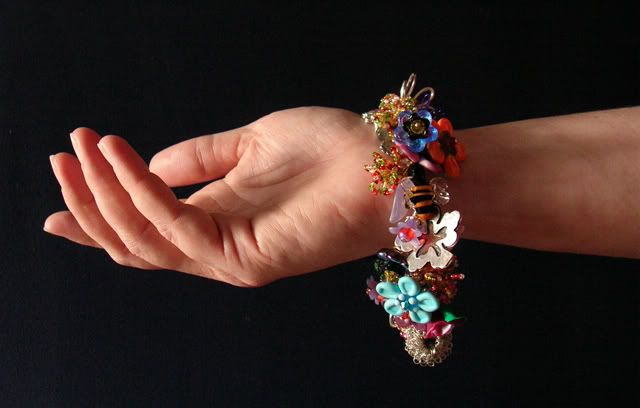
For the second year in a row, the SATeam is having a fabulous promotion! Between 10/17/10 and 11/28/10, anyone who purchases an item from any of the participating SATeam shops will be entered in a drawing to win this beautiful charm bracelet, featuring an eclectic collection of handcrafted charms from many individual team members!


This year, we chose a floral theme for the bracelet. Doesn't it look like a fabulous garden?


Can you guess which charm I contributed? ;)


The full entry rules and a list of the participating shops can be found at the SATeam blog, which will be featuring tons of gorgeous items by the participating shops for the duration of the sale. You can also find sale items by searching for SATEAMWRIST at Etsy.

At my shop, this promotion is valid for each jewelry and tutorial sale, so you can enter this drawing by purchasing either handcrafted jewelry, or instructions on how to make your own beautiful creations!

Happy Holiday Shopping!

Wednesday, October 6, 2010

Balloon Boxes with Bubbles

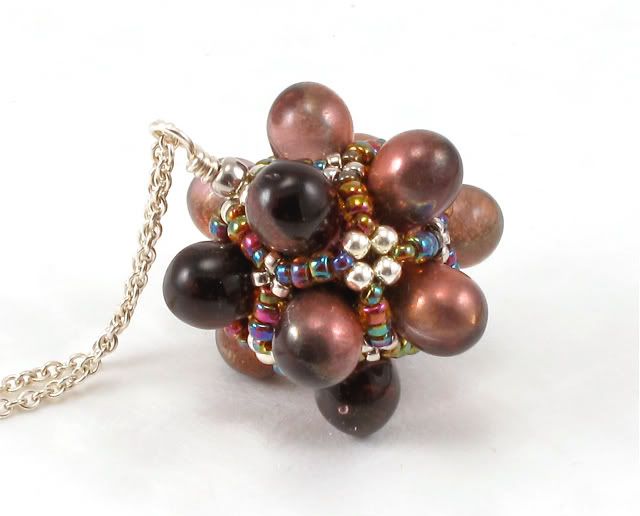
I've been experimenting with my newest beaded bead design, the Balloon Box. I actually made this blue and pink beaded bead a while ago to match some lampwork beads I was incorporating into a necklace. I ended up going with a different beaded bead design for the necklace, so this one became a pendant:


But more recently I came up with the idea to incorporate Miyuki fringe drop beads into this design (maybe it was from all the fun I've been having with Gwen's new Ionic Polyhedra pattern!). By replacing 24 of the seed beads with fringe drop beads, I ended up with these modified Balloon Box beaded beads:


Neat huh? 

Actually, the above two beaded beads have one key difference. Can you see it? 

Look closer... Can you see it now?

Give up?

OK, I'll tell you: these two beaded beads use different sizes of Miyuki fringe drop beads. The one on the left uses the classic 3.4 mm drops which have been on the market for some time now. The one on the right uses the brand new mini drop beads, aka 2.8 mm drops, which became available earlier this year. 

Here's another view of the beaded bead on the left, with the 3.4 mm drops:


And the one on the right, with the 2.8 mm drops:


It's a subtle difference, but it was more noticeable when I was weaving both of these beaded beads; the larger drops make the finished beaded bead look a little bit fuller, and they also cover the thread nicely as well. The smaller drops are a little easier to weave into this design, but more of the thread shows in the finished beaded bead. 

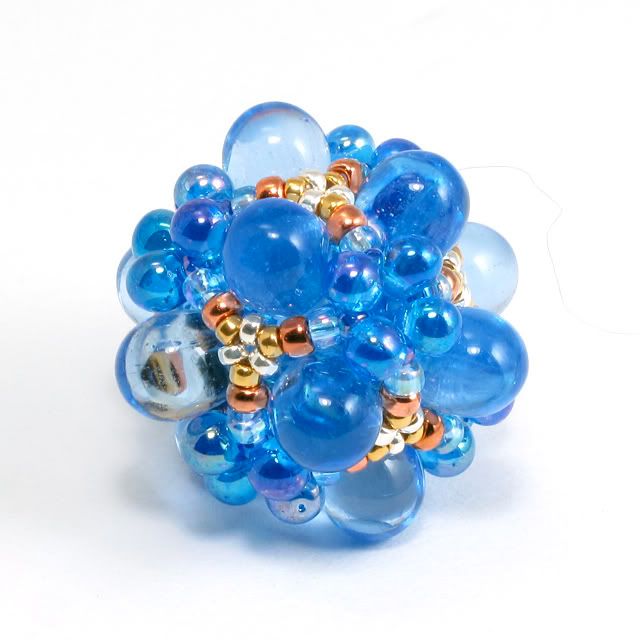
So, for this Balloon Box beaded bead variation, I'm going with the larger fringe drops, which is fortunate because these beads are made in a wider variety of colors and are also more widely available at this time. I made another one of these Balloon Box variations in blue and precious metal colors, to match some "Luna" Venetian beads I've had kicking around in my bead box. 


I'm not sure if this beaded bead quite matches the Venetian beads though; it ended up much more blue than I had planned. 

Anyway, even though the 3.4 mm fringe drop beads worked best for this variation, I'm not giving up on the 2.8 mm drop beads; these are just too cute to keep locked away!  

Monday, October 4, 2010

Japanese Seed Beads, In Japan!


For our honeymoon a few months ago my husband and I traveled to Japan. Why Japan, you might ask? Well, we had always wanted to go there, my sister is currently living in Osaka so we could visit with her while we were there, and we wanted an adventurous trip to a place different from what we were used to.

But my visit would not have been complete without...


...A visit to a Miyuki bead store! 

My favorite Japanese seed bead manufacturer, Miyuki Co., ltd, operates three retail stores in Japan. The employees at their Tokyo branch kindly allowed me to take pictures after I asked them (in Japanese! For the curious, it's "Shashin o totemo ii desu ka?" Props to my sister for the survival Japanese lessons!), however the Osaka branch was decorated with "no photography" signs so I didn't even try to take photos there. 

The Tokyo store is three stories tall, with the first floor taken up entirely by Miyuki seed beads:


A big difference between these stores and the Californian bead stores that I've been to is the storage and display of the seed beads. While their Delica beads are sold in 5- and 20-gram boxes, the rest of their seed beads are displayed in rows and rows of individual jars and are sold from these jars in carefully-weighed out 8-gram increments. This display makes the whole place look like a candy store:


Here are some fringe drop beads in their respective jars, in one of my favorite cobalt blue colors:


While this display was quite impressive, I think that it actually made it easier to stay within my shopping budget. Language barriers aside, it's easy to pick a pre-packaged tube of seed beads off the shelf in a Western store and take it up to the counter to have the sales clerk ring it up. While the three young women helping me at this shop were quite efficient in weighing, packaging, and labeling my bead purchase, I would have felt somewhat uncomfortable to ask them to weigh out 30 different kinds of seed beads. 

This store must sell over 100 different kinds of kits:


They even have some geometric kits!


I loved the different kinds of beadwork that they had on display. Check out this loomed lamp cover and the purses in the background:


But the cutest display was definitely this little French-beaded flower garden right next to the register:


So, did I break the bank? Actually, I was able to restrain myself :). I was mostly looking for seed beads which I haven't been able to find here in the States, and I found that this selection was quite small; 99.9% of their stock is also readily available at retail bead stores the USA. In fact, I was surprised to find that both the Tokyo and Osaka stores were not yet carrying the new Tila and small 2.8 mm drop beads which had just started to appear here in the US.

I did manage to find some dichroic-lined seed beads in shapes and sizes that I haven't previously seen. Here they are in the 10° triangle size:


Finally, just to show that we visited other places in Japan besides bead stores, here we are at the Shitennoji temple in Osaka:


And at the Kinkakuji temple in Kyoto:


So, in conclusion, it's relatively easy to go bead shopping at Miyuki's Japanese retail stores without spending your entire vacation budget. Just... Don't ask about my washi shopping spree...

Thursday, September 30, 2010

Ionic Cubes and an Octahedron

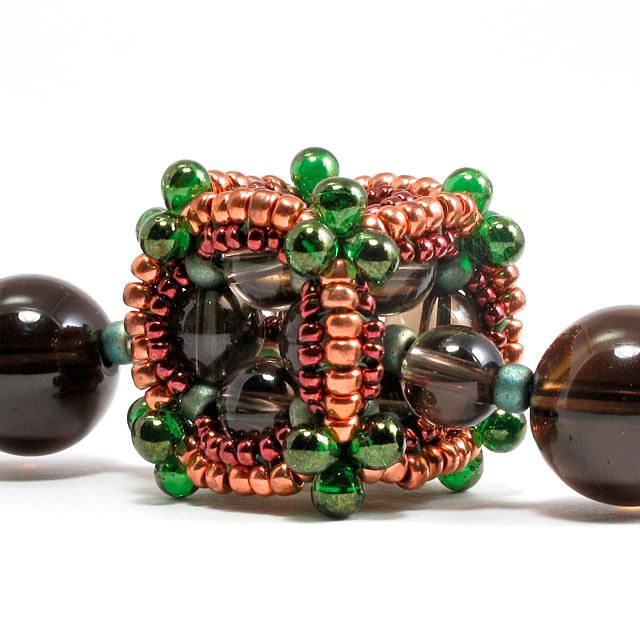
I had the pleasure and privilege of testing Gwen's new Ionic Polyhedra pattern, and I ended up with a nice handful of these fascinating beaded beads. I began with the Ionic Cube, the first Ionic Polyhedron in the pattern:


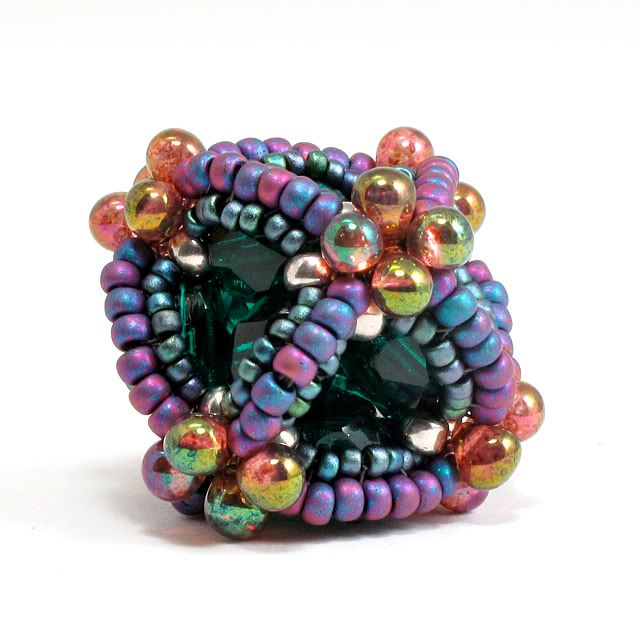
I used smoky quartz round beads that I had kicking around from a previous Rings and Things Roadshow shopping spree, which led me to create this beaded bead in a nice fall palette with metallic and copper-plated seed beads, plus some goldluster green fringe drop beads. I think that the copper-plated seed beads are a little bit bright right now, but in my experience these seed beads tend to oxidize over time, so this beaded bead should look nicely color-balanced after a little while.

This design was really satisfying to make. It starts out a little loose and squishy, but ends up very stiff and sturdy by the time it's complete. I found this aspect particularly satisfying considering that it's completely hollow.

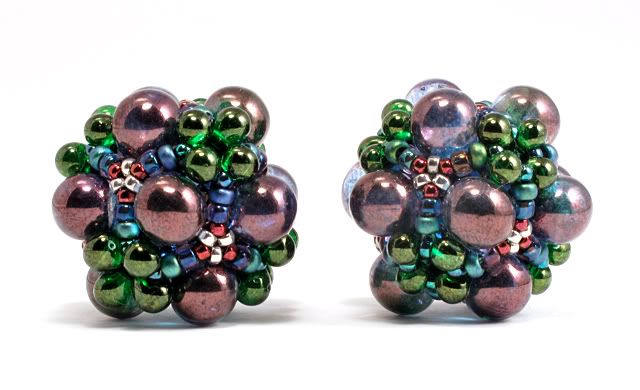
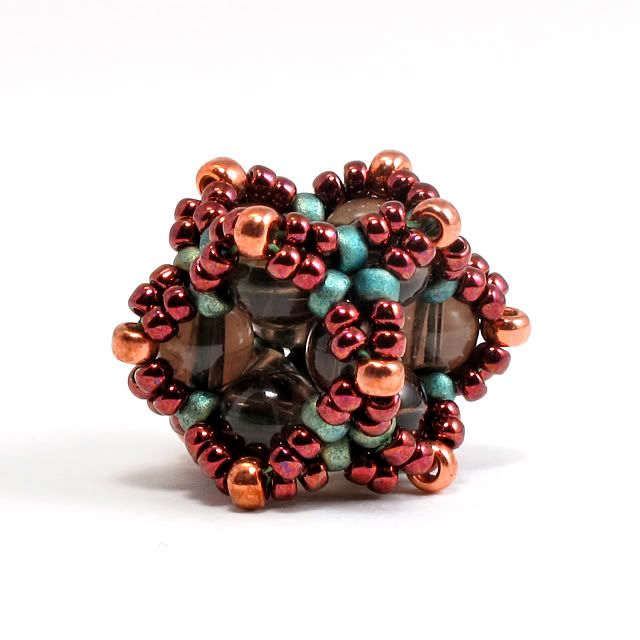
I also made some matching Mini Ionic Cubes, which are explained in the pattern as variations:


These little beads are right up my alley; they're small, cute, and work up really quickly. In addition to looking nice as a pair of earrings, I think that five or seven of them would work well in a choker or princess-length necklace.

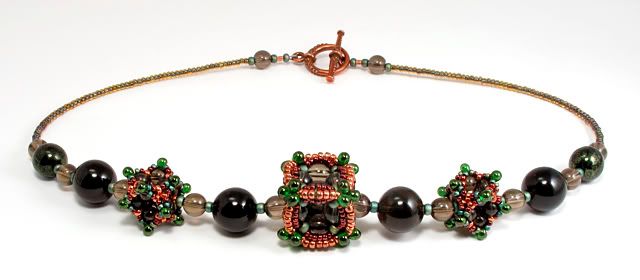
I made two of them and strung them with the regular Ionic Cube, along with more round smoky quartz beads and Japanese seed beads. I even added my own little touch to the Mini Ionic Cubes... Can you tell?


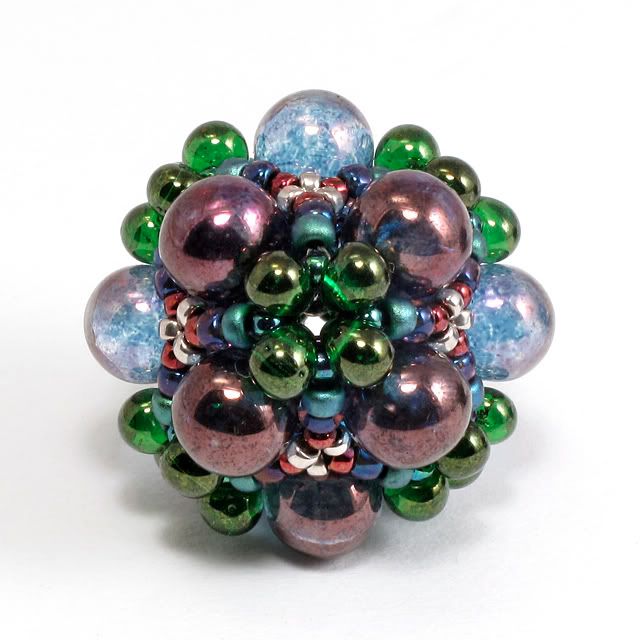
I haven't yet decided what to do with my second regular Ionic Polyhedron. This one is the Ionic Octahedron, for which I used firepolish Czech glass beads and more matte Japanese seed beads:


I'm thinking that it would make a nice solo pendant, but I might want to incorporate it into a necklace with other beads... I think I need to mull it over a bit more.

The Ionic Polyhedra pattern is available at beAd Infinitum, and it explains, in great detail, how to make these and other polyhedra in both the mini and regular Ionic forms. Florence wrote an interesting post on the evolution of this design, which is a must-read for anyone interested in the behind-the-scenes development of new beaded bead ideas. For more examples of Ionic Polyhedra, check out Gwen's beaded beads here here and here. Her Ionic Rhombic Dodecahedron, shown on her blog, is particularly fantastic!

Tuesday, September 28, 2010

Balloon Box Pendants in the Shop

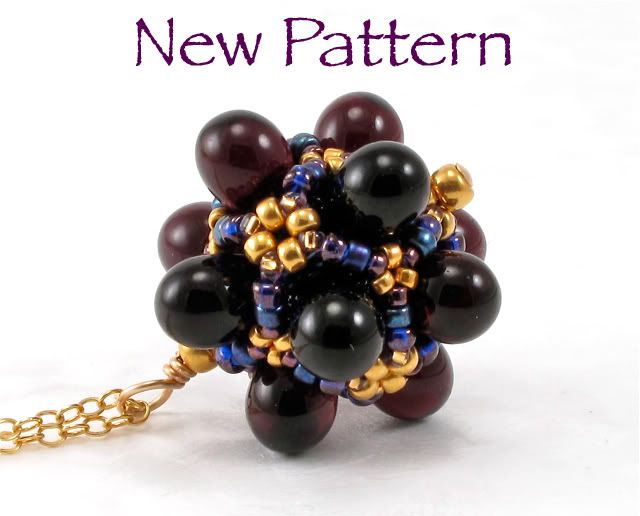
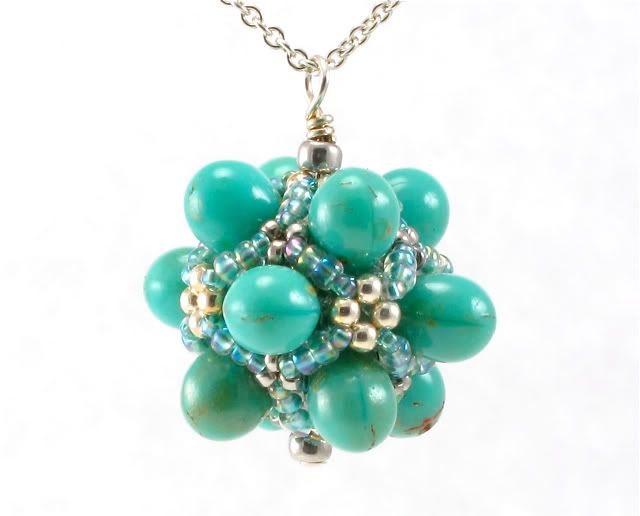
I listed a few new pendants in my Etsy shop. All three of these pendants use the Balloon Box beaded bead design.

Here's one in purple:


All three pendants are available in my Etsy shop. The Balloon Box Pattern is available at beAd Infinitum if you'd like to make your own.

Monday, September 27, 2010

My Handmade Wedding, Part 2


On to Part 2 of pictures from my wedding, where I'll talk about the favors, flowers, and other crafty decorations. If you missed it before, check out Part 1 for the jewelry and dresses.

As with Part 1, all of the photos you are about to see were taken by Jason and Juvenia, who own the copyright to said photos. Check out their website at www.jasonandjuvenia.com for more beautiful wedding photography.

We looked all over the San Francisco Bay Area for our wedding venue, but we found the perfect place at the nondenominational St. Peter's Chapel on the old decommissioned naval base only 10 minutes from our house:


I had originally envisioned having an outdoor wedding, but we loved this chapel for two main reasons. First, most of the chapel's 25+ stained glass windows were done by Tiffany studios, making it the largest collection of Tiffany glass under one roof west of the Mississippi. The colors in these windows are just breathtaking:


Second, my husband Darby is a professional French horn musician, and the acoustics in this chapel were perfect for a horn choir. He arranged all the music for our ceremony, and a group of his friends and colleagues so kindly agreed to play in our wedding. It was such a special gift to both us and our guests:


Darby even played in a few of the selections himself. He must have spent over 40 hours selecting and arranging the music:
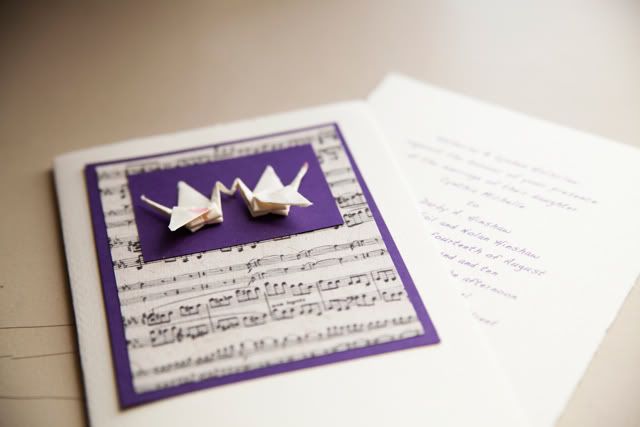
Together with my Mom, we designed our wedding invitations to show our collective talents in music and origami:


And in keeping with the origami theme, the favors were a pair of paper cranes in the Rokoan style, connected at the wing. Rokoan style paper cranes are made from one sheet of paper that has been cut in a specific pattern to create connected paper cranes, usually joined at the wing tip or nose (Linda Tomoko Mihara makes breathtaking origami pieces in this style). No glue is needed for these connected paper cranes, but it can be difficult to fold them together without tearing the paper at the connections. I had thought about making the more-romantic kissing cranes for the wedding favors, but these can be rather delicate, so I did flat kissing cranes for the invitations and more durable wing-connected cranes for the favors:


I didn't make quite enough for a Senbazuru, but together with Darby we must have made close to 500.

Our wedding flowers were both fresh and beaded. Some french-beaded wisteria from Carol Benner Doelp's The Art of French Beaded Flowers were perfect for decorating the card-collecting box:
My bouquet included roses, orchids, and some kind of greenery from my backyard:


With one hidden french beaded flower made by my late great-grandmother Mimi:


My bridesmaids' flowers contained roses and some beautiful pink and purple hydrangeas:
And our display cake, baked by my expert-baker friend Shannon, was decorated with some pretty purple orchids:


The rubber duckie cake-toppers are a funny story: last March I went to a bridal fair and nearly had a nervous breakdown from all the pressure from the bridal vendors, and from what I can only describe as the "look" they gave me when I said I was planning my wedding in 6 months, not 18. My Mom and I went to Joann Fabrics afterward, where we ended up picking out the pattern for my dress, followed by a visit to a Michaels craft store. I found these duckies there and bought them on the spot, because I thought they were cute and whimsical and added a much-needed flavor of humor to the whole planning process.

The cake toppers led to the design of the floating-flowers-and-mini-rubber-duckies centerpieces, which were put together by some good friends from work. The big rose is from my backyard!


To wrap it all up, here's a photo of the whole wedding party:
And the happy couple:


Thanks for looking!

Monday, September 20, 2010

New Pattern: Balloon Box Beaded Bead

My newest pattern, the Balloon Box Beaded Bead, is available for purchase!


You might remember the post I made about this design earlier this year. I began designing this beaded bead with the goal of using larger 6 by 9 mm Czech teardrop beads instead of the 4 by 6 mm drops that I usually use. The resulting design is so fun to make! I could easily make a half dozen of them in an afternoon without getting bored. As I mentioned in the previous post, they work well as both necklace components and as solo pendants.


This design is also quite amenable to variations. I experimented with making 5- and 6-fold variations, using crystals instead of drop beads, and also using drop-shaped freshwater pearls. I love how the pearl version of this design turned out:


I incorporated these pearl Balloon Boxes into a pearl-themed necklace. The focal is the 5-fold version of this design:


I couldn't bear to sell this necklace, so it became a mother-of-the-bride gift for my Ma :).

The Balloon Box pattern is currently available at beAd Infinitum, alongside my Circle Starburst pattern and a few dozen of Gwen and Florence's mouthwatering beaded bead designs. For more Balloon Box images, check out the beAd Infinitum Galleries!

As always, I'd love to see your own Balloon Box beaded beads!
Related Posts Plugin for WordPress, Blogger...