Tuesday, March 12, 2013

New Pendant with Rizos and Rivolis

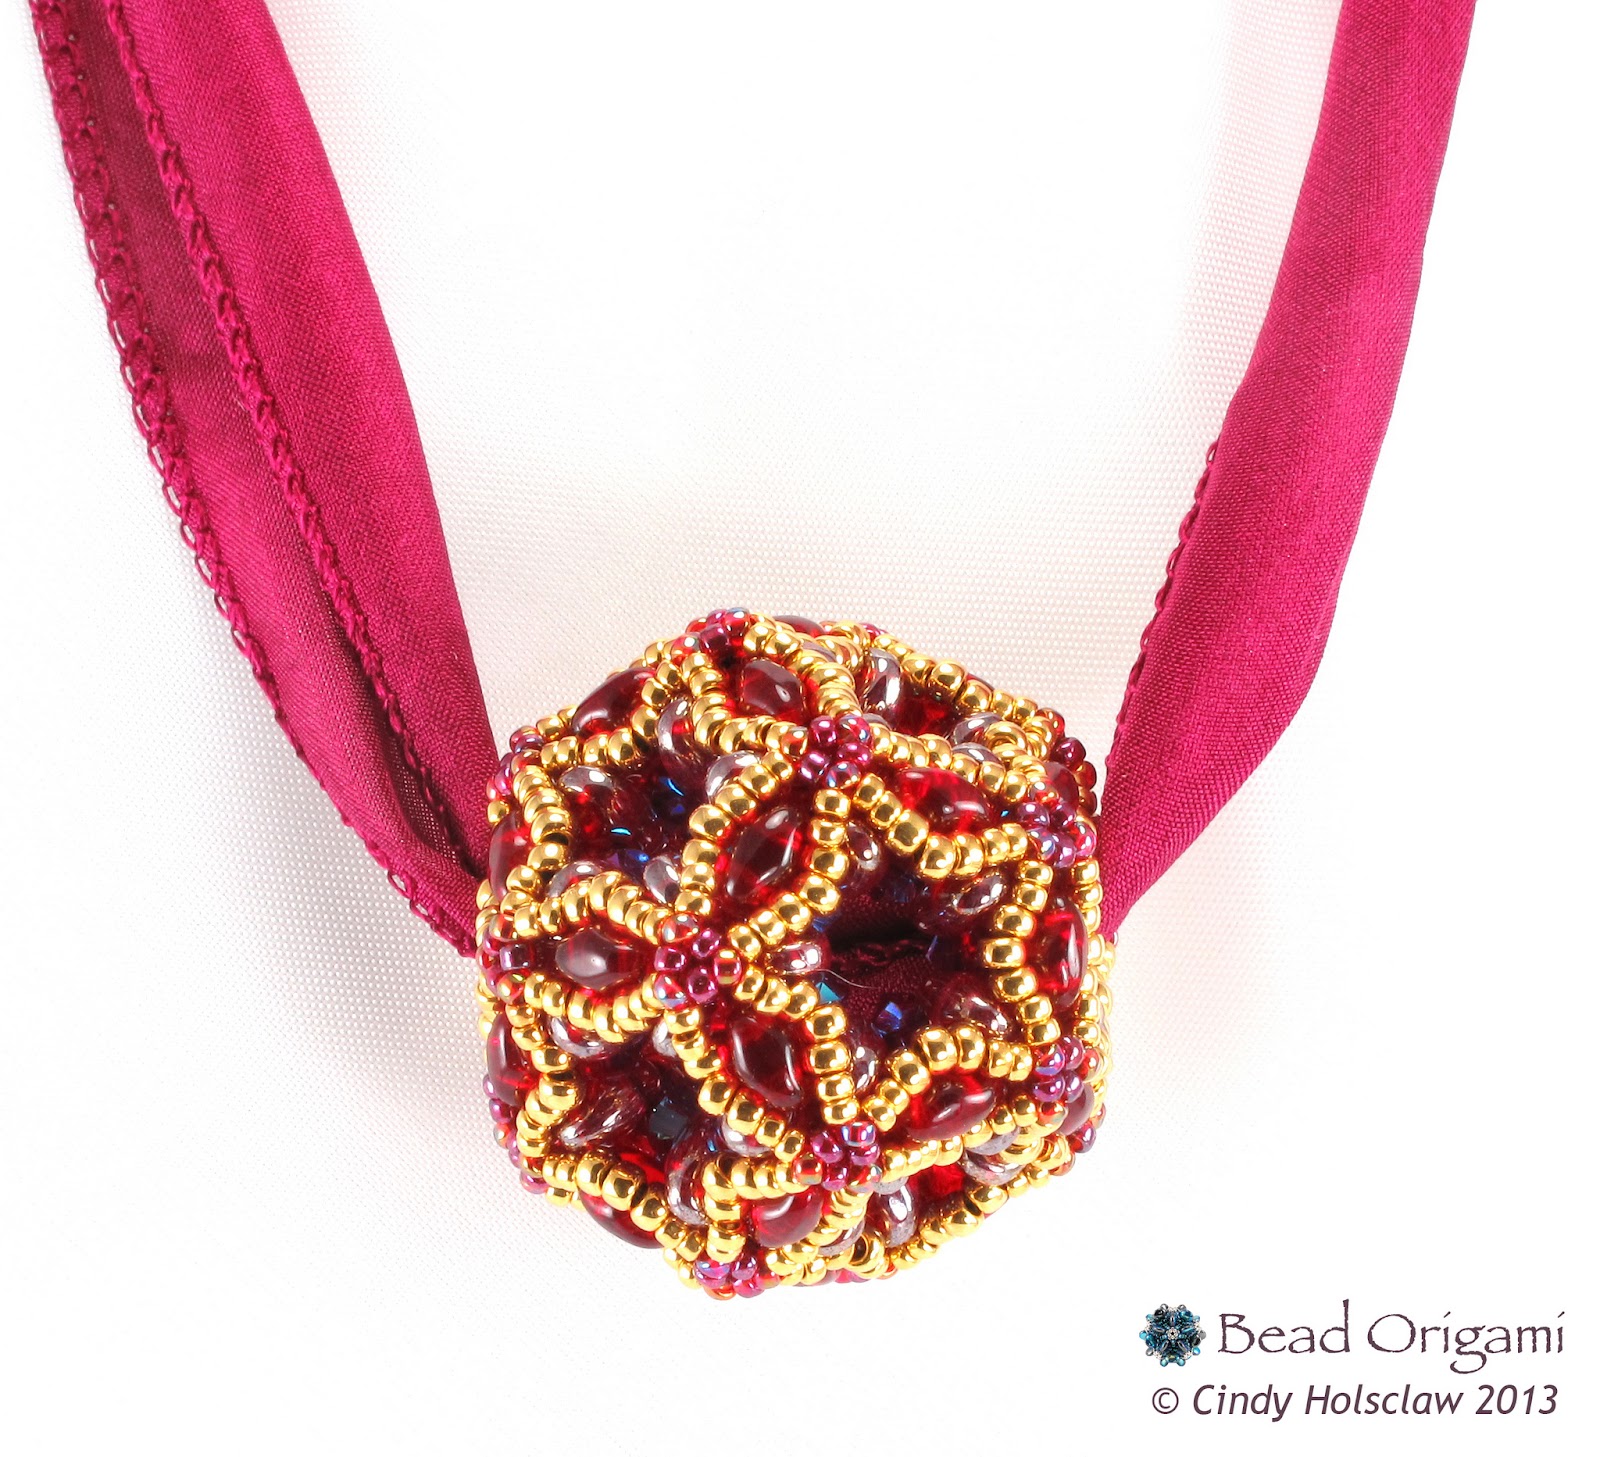
I don't know about you, but I'm looking forward to the start of spring. So, I designed a new pendant with a floral theme.

Design Goal: Something Flowery, with Rizo Beads


I thought that the new rizo beads looked a lot like little flower petals, so I experimented with several different ways of making them into little beaded flowers. After weaving several uninspired prototypes, I finally got the obvious idea to just stick a big rivoli crystal in the center of them. From there, some Czech drop beads and rivoli pendants just fell into place, resulting in this very flowery pendant.


Solution: Rivoli Crystals!


Clearly, a central rivoli was the solution to this design conundrum, and I'm learning that, rather than getting out-of-style, a bezeled rivoli can really enhance a beading design. I like how so much of the rivoli is visible in this pendant, since they sometimes get buried by the beads used to bezel them in other designs (including one of my own).


I still need a name for this pendant... Rivoli Kaleidoscope is already taken, and it isn't really a cherry blossom or a tulip. What do you think?

Saturday, March 9, 2013

Origami Interlude: Tiny Paper Cranes

If you've ordered any beading kits from my website in the past couple of months, you might have noticed something special included in your shipment.


These tiny little paper cranes came about from a minor conundrum I faced a little while back...

What to do with leftover washi? 


As I previously mentioned, I hand-fold custom masu boxes for each piece of jewelry that I sell in my Etsy shop, and I cut the paper for these boxes from large (about 24" by 36") sheets of washi. I usually have a little bit of scrap paper leftover after cutting the washi into 6-inch squares for the boxes. It isn't much paper; usually strips measuring one to two inches by 6 inches, but since washi is so beautiful (and expensive), I can't bring myself to just throw the scraps out. Here's a sampling of them, after I cut them into 1 1/2-inch squares:


But the question was; what to do with these tiny pieces of paper?

The answer: tiny paper cranes!


I do origami the way that many other beaders knit: it's not my primary art form, but I enjoy it in my non-beading time and at this point the process of folding a paper crane is nearly subconscious. I've been known to fold paper cranes out of everything from dinner napkins to those tiny tags on the ends of teabags. So, when I sat that stack of scrap washi paper next to my computer, before I knew it I had a pile of tiny paper cranes. Here are a couple of them with a quarter (left) and a 100-yen coin (right).


Here they are posing with a small Plum Egg beaded bead:


Lounging around with a Fiberoptic Dodecahedron Pendant:


And swimming in a new, as-yet-unnamed design with rizos and rivolis (a "rizoli" design?):


Finally, just to give you an idea of how many I've folded, here's just a sampling of the pile of paper cranes:


Since they're threatening to take over the space next to my computer, I decided to send them out into the world with each kit order from my website. Look for your own tiny paper crane in your next Bead Origami kit order!

If you'd like to fold your own paper crane, this site is a great place to learn how. They're pretty easy to fold, but if it's your first time folding a paper crane, I recommend starting with a larger sheet of paper such as a 6-inch or 8-inch square. Check out some of my previous interludes into paper origami here, here, here, here, here, and here.

Do you have a secondary craft? If so, what is it? Drop me a line in the comments below!

Thursday, March 7, 2013

Easter Egg Basket

At about this same time last year I wrote up the Plum Egg beaded bead pattern, which was inspired by an origami structure of the same geometry. At the time I had the idea to make an Easter basket full of these pearly little beaded eggs, but I just didn't get around to it.

An Easter Basket of Beaded Eggs


This year I put together something resembling what I was thinking of; not a whole Easter basket's worth of Plum Eggs, but rather enough of them to fill a small glass candleholder:


These beaded beads were woven from either freshwater pearls or Swarovski crystal pearls, using either the design described in the Plum Egg pattern, or from a smaller variation of the Candy Dodecahedron design.


Would you like to make your own basket of beaded Easter eggs? The pattern for this beaded egg is available at my website!

Tuesday, March 5, 2013

Ways to Wear the Fiberoptic Dodecahedron

After designing the Fiberoptic Dodecahedron Pendant, a lingering question on my mind was how to incorporate it into jewelry. I debated using it as a focal piece in a beaded necklace, but it's such an intricate design that it works very well just on its own. The question then is how exactly to string it...

Option 1: String on a Thin Cord


The holes of the Fiberoptic Dodecahedron Pendant can easily accommodate a twisted nylon cord. This 3 mm cord will fit through two adjacent holes, but I needed to use a small crochet hook to get the cord through both of them without it getting lost in the middle of the pendant.


Option 2: String on a Chain


Another, slightly easier option is to use a simple chain. With a very thin gold chain, the Fiberoptic Dodecahedron Pendant almost looks like it's floating in air.


Option 3: String or Knot on a Silk Ribbon


A third option is to string it through a silk ribbon. I needed to use a large-eye needle to get the ribbon through the pendant, but I experimented with a couple of different ways to string it. The first is through two adjacent holes as shown in the previous two options above:


The next method is through two opposite holes:


I also went back to the two-adjacent-hole stringing method, and I tied a loose knot between the pendant and the rest of the silk ribbon. I like how this knot makes the ribbon form more of a V-shape, but I'm not sure if it really complements the pendant...


Option 4: Combine With the Mini Beaded Bead


The last stringing option that I tried was to string it through adjacent holes with the silk ribbon, and then through the complementary mini beaded bead. I think I like this method better than the knotted method.


The pattern for the Fiberoptic Dodecahedron Set, which includes instructions on how to weave the pendant, the mini beaded bead, and a matching pair of earrings, is available exclusively at beadorigami.com.

What's your favorite way to string a complex beaded pendant?

Monday, March 4, 2013

Chocolate Molecules

What's better than beaded molecules from coffee and tea? How about one from chocolate?


Theobromine


Caffeine is just one of a class of molecules called xanthines, which also includes a compound called theobromine. It actually doesn't contain any bromine at all, but it rather gets its name from the plant name Theobroma, from the greek roots "Theo" (God) and "broma" (food), meaning "food of the Gods." And really, is there any better way to describe the tree that gives us chocolate?

Theobromine is the primary alkaloid found in chocolate and cocoa powder, though it's also found in lesser amounts in coffee, tea, and yerba mate. It has a similar but more subtle effect on the nervous system compared to caffeine. Chocolate also contains hundreds of other compounds, including caffeine, a third xanthine called theophylline, and phenethylamine, the so-called "chocolate love chemical."

Caffeine vs. Theobromine


From a structural chemistry point of view, theobromine and caffeine differ in just one way: caffeine has a methyl group where theobromine only has a hydrogen atom at the N1 position. I've circled this difference in their chemical structures below:


So, if we want to make a beaded version of theobromine, all we need to do is weave the structure of caffeine, and leave off that extra methyl group. Can you see where the methyl group sits in this green tea caffeine pendant?


Chocolate-Themed Theobromine Pendants


I tried this variation with chocolate-themed seed beads, and got so carried away with myself that I wove three different theobromine pendants. The first is in carmel chocolate flavors:


The next is a milk chocolate:


And finally, the last is in my favorite of all chocolates, a delicious dark chocolate:


All three pendants are available in my Etsy shop!

Saturday, March 2, 2013

Designing Matching Earrings

Too often, I will make a fancy pendant or a necklace without a matching pair of earrings. I come to regret this decision every time I need to go out to a nice dinner or one of my husband's symphony concerts, as my jewelry box gradually fills with either fancy statement necklaces, or casual, everyday earrings. So, after I designed the Fiberoptic Dodecahedron Pendant and its matching beaded bead, I took it upon myself to make a matching pair of earrings before calling this project finished.


Design Goal: Matching Earrings for the Fiberoptic Dodecahedron Pendant


Before I started, I knew that I wanted the earrings to have a couple of characteristics:
  • The earrings should match the style of the pendant
  • They should contain SuperDuo beads
  • They should be smaller than the pendant but still complement its form.


Option 1: Beaded Beads in a Smaller Symmetry


The first route that I could have taken was to make a pair of Fiberoptic Cube beaded bead earrings, or even a variation on this design. Indeed, I wove triangular prism versions of this design for an earring swap a while back, and for earrings I actually like this variation better than the original Fiberoptic Cubes.


The only problem with this approach is that the square faces of this design don't match the pentagon-shaped faces of the pendant, and I really like how the pendant looks like it is covered with little stars, so I wanted this reflected in the earrings.


Option 2: A Previous Design also with SuperDuos


Another option I could have taken was to match a previous earring design to that of the pendant. For example, I could have explored this idea with the Snowflake earrings:


I didn't take this route because the lacy style of the snowflakes doesn't really match the more clear-cut style of the pendant.


Option 3: A New Design, with a Star like the Pendant


I instead settled on making a new earring design, and I focused on creating just one of the twelve stars present on the original pendant. I first came up with these earrings, which retain the pentagon shape of one of the faces of the pendant, and also use the same types of beads.


The only problem with these earrings is that the stars aren't as pointed as those on the original pendant. This is because I used a slightly simpler thread path to add the 15° seed beads.


Option 4: An Improvement on the New Design


To improve on this earring design, I went back to the lace overlay thread path that is used in the original pendant, and this makes the stars on the earrings nice and pointed!


In this photo, you can really see how the final earring version matches up with the stars on the pendant:


Success!


Are you ready to make your very own pendant and earring set? Patterns for the Fiberoptic Dodecahedron Set and the Fiberoptic Duo Beaded Beads are available exclusively at beadorigami.com!

Friday, March 1, 2013

New Pattern: Fiberoptic Dodecahedron Set

I finished the pattern for the Fiberoptic Dodecahedron, and it's now part of a set of designs available on my website at beadorigami.com.


The cornerstone of this set, the Fiberoptic Dodecahedron Pendant, came about as a variation of the Fiberoptic Duo Beaded Beads. However, the core of the pendant has such a complicated thread path compared to that of the beaded beads, so much so that I felt that it needed to be written out in its own pattern. In the course of designing this pendant, I also found that a matching beaded bead can be made from 11° and 8° seed beads, so I included the instructions for this beaded bead too.

The pendant is surprisingly sturdy, especially since it's completely hollow! Its holes are big too, at about 5 mm in diameter (you can drop a stream of 4 mm bicone crystals clear through it), so it can easily fit on beading wire, a chain, or a cord. But after a suggestion from Marcia DeCoster (her all-knowing bead wisdom truly knows no bounds), I've been experimenting with stringing them on silk ribbons:


Finally, I liked the little stars on each face of the pendant so much that I figured out how to make them into matching earrings! The instructions for the earrings complete the trio of designs in this pattern.


The complete pattern is for advanced beaders, although I included a ton of illustrations, so anyone familiar with reading beading patterns should be able to follow it. If you're new to using SuperDuos or other two-hole beads, you might want to try the Fiberoptic Duo Beaded Beads first before attempting the Fiberoptic Dodecahedron Pendant. Fortunately, this pattern does have something for everyone; the earrings are at the Advanced Beginning level!


The pattern for the Fiberoptic Dodecahedron Set is available exclusively at beadorigami.com if you'd like to make your own!
Related Posts Plugin for WordPress, Blogger...